


This article describes the simple update process of SkyRadar and NextGen.
The update process is very easy now. Click on the update link at the bottom of the admin panel to start it.

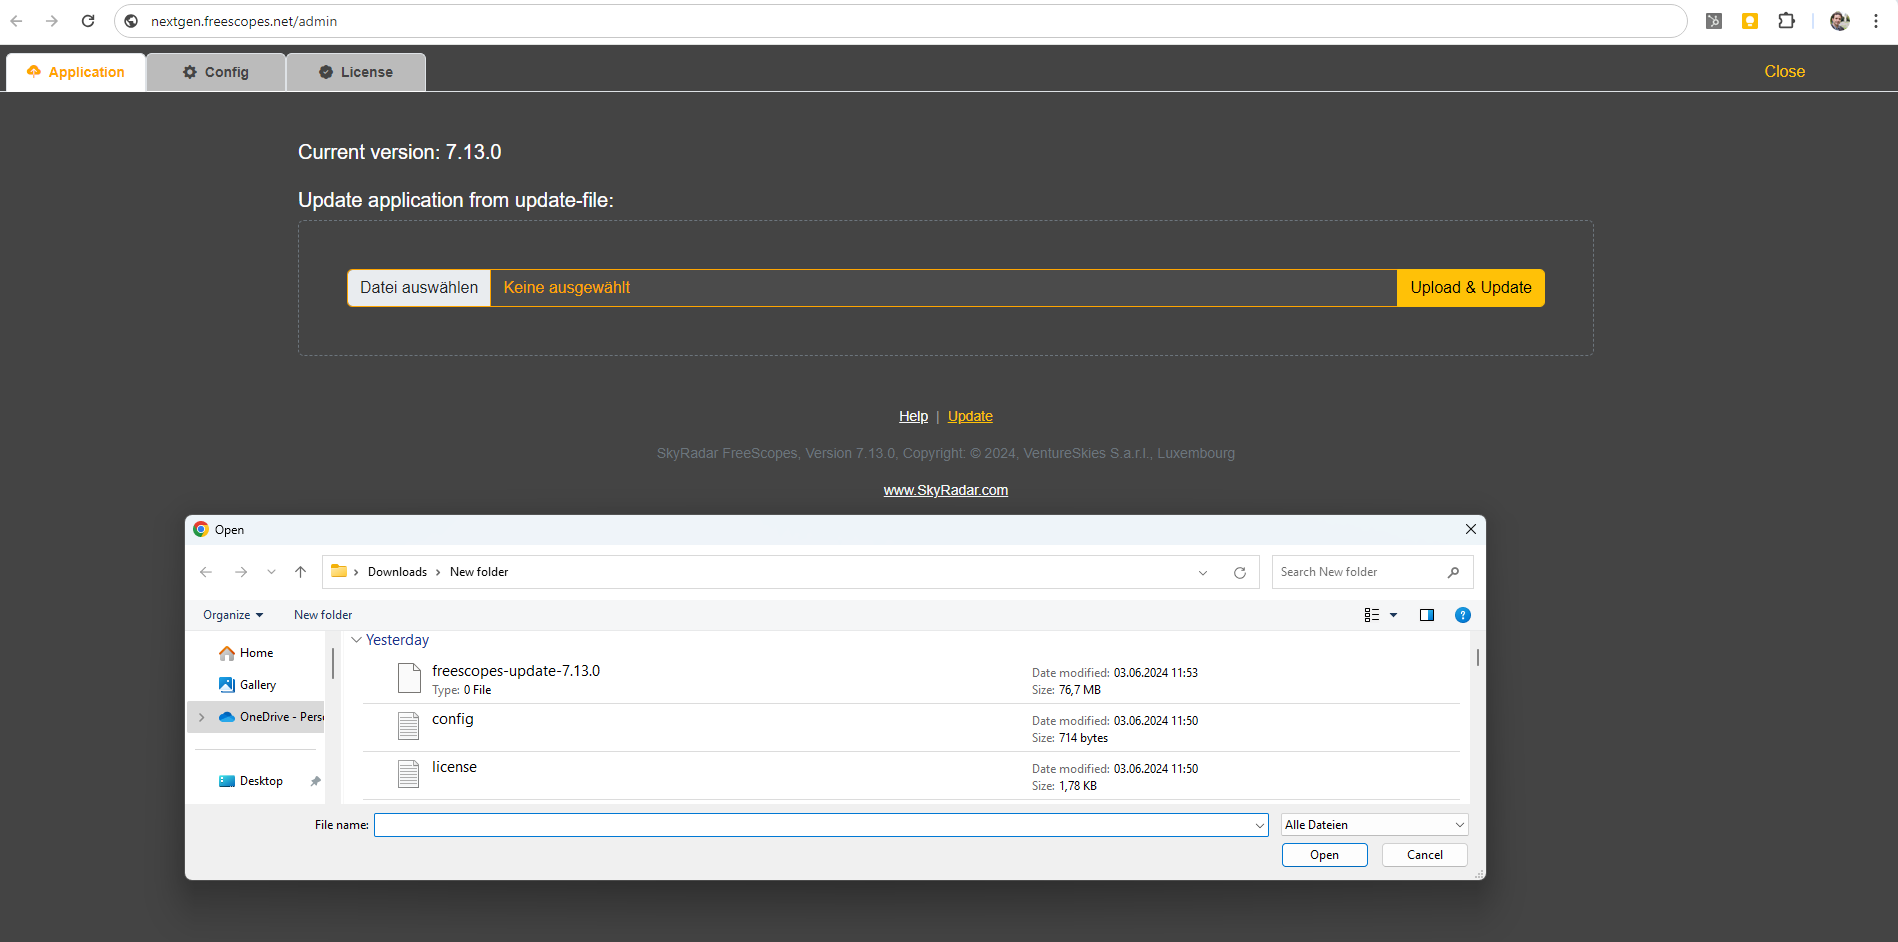
Upon clicking on the update link, the update panel will open.
Just be aware you will need to update the CloudServer and NextGen. Why update NextGen too? NextGen also includes a little server to be able to run with a small group of students concurrently.
- For CloudServer the address in the address bar is: server.freescopes.net/admin
- For NextGen the address is: nextgen.freescopes.net/admin
This means you will do the following steps twice.
Step 1: Updating the Application File
You will first click on the tab “application” and select the update file which you received from SkyRadar. Then click upload and update.
Step 2: Updating the Config Text
In the 2nd step you will click on the tab “Config” and paste the new configuration text which we shared with you into the window. Then click “Update”.

Step 3: Updating the License Text
In the last step you will click on the tab “License” and paste the new license text which we shared with you into the window. Then click “Update”.

Repeating the Procedure for the CloudServer
Do not forget to repeat these three steps for the CloudServer in the address bar: server.freescopes.net/admin
Watch the Explainer Video
The following video guides you through the process.
Let's talk
Stay tuned to be always the first to learn about new use cases and training solutions.
Or simply talk to us to discuss your project.